June 05, 2005
Window work
When we first bought our house, it was obvious that it needed a lot of work. We immediately stripped and refinished the floors throughout most of the house (and eventually added a layer to the livingroom floor). We had much of the electrical work and the plumbing replaced, though there's more to do. Two years ago, we did some major work on energy efficiency that's saved us a lot of money.
When we first did that, I asked about replacing the windows. Much to my surprise (and now to my happiness), the contractor said that replacing the windows would cost a lot and not have nearly the same return that the rest of the work we were doing would provide. So long as we used the storms correctly, there wasn't much point in replacing windows. (Yes, I know there's a huge industry devoted to making money by replacing old windows with extruded aluminum or vinyl. I'm happy to have escaped them, and Significant Elements seems to agree.)
This year's project has been painting, both interior and exterior. On the outside of the house, the bulk of the paint has been stripped since January, and I'd been planning to do some work on windows before the painters came back to finish.
Well, the painters are supposed to return Wednesday, and I've barely started on the windows. I'd pulled off the storm windows, and started stripping paint on some of the screen windows, as well as unstuck most of the upper sashes on the downstairs windows. (I haven't yet managed most of the the upstairs windows, though the back and one side window are casements that are also mostly painted shut.)
Yesterday, for whatever reason, I decided to take apart at least one window and see how it went. I picked a window on the side of the house which I knew had problems in its lower sash, and started taking it apart. With a (very helpful) copy of Terence Meany's Working Windows by my side, I removed the inside stops, which were mostly held with screws except where some past genius had decided to add nails (and split the stops).
Once the stops were off, I could remove the lower sash, pulling it forward, removing the ropes from the sides, and carefully letting the ropes roll back up to the pulleys. Now I could see the pockets for access to the counterweights, but I couldn't open the pockets, as the parting bead - a piece of wood that separates the upper and lower sashes - was in the way.
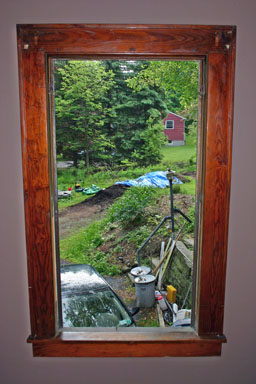
The parting bead is a piece of pine that's just pressed into a groove. Removing the upper sash means pulling the bead out of the groove. Unless you can get the upper sash all the way to the bottom, it also means breaking the bead and planning to replace it. (84 Lumber had plenty of it.) I broke the bead on both sides and removed it, which let me pull out the upper sash and open the pocket covers. I didn't need to do anything with the weights or ropes, but wanted to see what they looked like. At this point, I had a view through an empty window frame.

Looking out of an empty window frame.
After cleaning up the upper sash a bit and clearing paint off the outer stops so it would move more freely, I prepared to put it back in. I put in the sash, and then started on the parting bead. To put the bead back in, the sash has to be lowered to the bottom, and then the bead gets inserted into the corner. I used a rubber mallet to get it all the way in, though it was more of a challenge going in than coming out.
Next, I focused on fixing the lower sash. Someone had put in screws, but they'd rusted while the wood rotted. I clamped the window back together and applied some wood hardener to the busted corner. After that had settled, I used some wood filler, with a few dowels filling the screwholes as well.
To re-assemble the joints, I tried out a pair of Miller Dowels, stepped dowels that seemed long enough to do the job and likely to have enough useful glue surface to successfully grip the bottom rail of the sash. It seems to work, but I'll report in a few years. If it doesn't work, I'll eventually have to replace the rail or the entire sash.
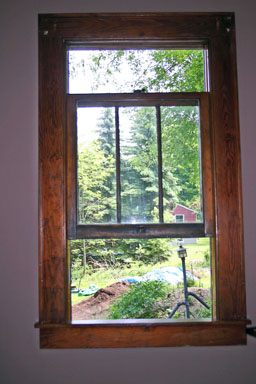
Re-inserting the lower sash was mostly uneventful, except that I realized that the parting bead has to be perfectly all the way in for the lower sash to move smoothly. A few more hits with the mallet fixed it, and I was able to reinstall the sash and the stops.

Finished window, with both sashes in the middle.
I also finished some work on a screen window for the kitchen. The house only has a few screen windows, but I'd like to get them installed. Unfortunately, the screens have had even less care than the storms, with many of the trim pieces rotted, the screens wrecked, and so on. I started with the kitchen screen because it's small, but I'm also working on the (vastly more intricate) screen insert for the front door.
The long-term plan, of course, is to do this for all of the windows in the house, getting them all working like they're supposed to.
I've put up a whole gallery of pictures of window removal and re-installation if you're curious. I started taking pictures after I'd begun taking things apart, but there's still a fair amount there. Hopefully it'll be useful to some readers, especially those contemplating replacing windows that can still be repaired. The window works beautifully now.
Posted by simonstl at June 5, 2005 01:11 PMNote on photos